Slideshow Image 1


Welcome

Hi there! I'm glad you came and I hope you enjoy some of my photography favorites and recent sessions. I specialize in photographing kids, families, seniors and headshots for businesses. Sarah Heller Photography, LLC serves the North Central Kansas area including but not limited to Lincoln, Sylvan Grove, Lucas, Wilson, Downs and Beloit. Fill out the contact form to schedule a session.

Monday, March 23, 2015

All dogs go to heaven...Monday Moment

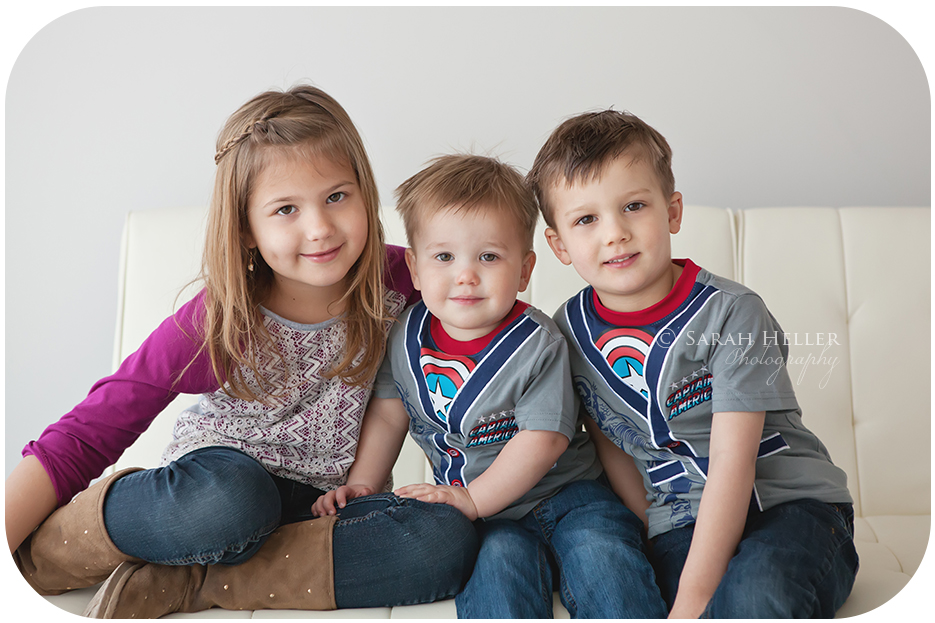
I lost my first "baby" last November and it came as such a surprise. Of course, I knew it would come eventually but he had been healthy and I just didn't think it would happen so suddenly. He was fine earlier in the day and other than the fact he had been struggling with an ear infection, he was fine. He had never had ear problems before and really never been sick in all the 10 years he had been with me. But, nevertheless, his time had come and we were all so sad (especially me and the girls). You see, he was my dog. I had dreamed of having a yellow lab puppy since I was in high school and especially during college and for sure after I started my first job. Fast forward a few years and I was a newlywed and new homeowner. I (we) was now eligible for a dog! All the places I had lived before would not allow pets. So, one day at work, a co-worker asked if I wanted a 9 week old lab puppy. I called my husband that day and brought Marshall, the puppy, home! Hubby wasn't too excited and let's just say the first few nights were a little rough (pun intended:)). He slowly grew on dear hubby and we became a family.  He was with us through it all: through moves, travel, through babies, and growing children who thought it was fun to wrestle. He befriended neighbors and relatives and many others. He loved people and was such a "gentle giant". 

So, as you can see, he left a mark on the lives of many. We soon will be adding a baby cattle dog to our family and while I'm sure he will be a fine dog someday, he will never be...there will never be another Marshall. 


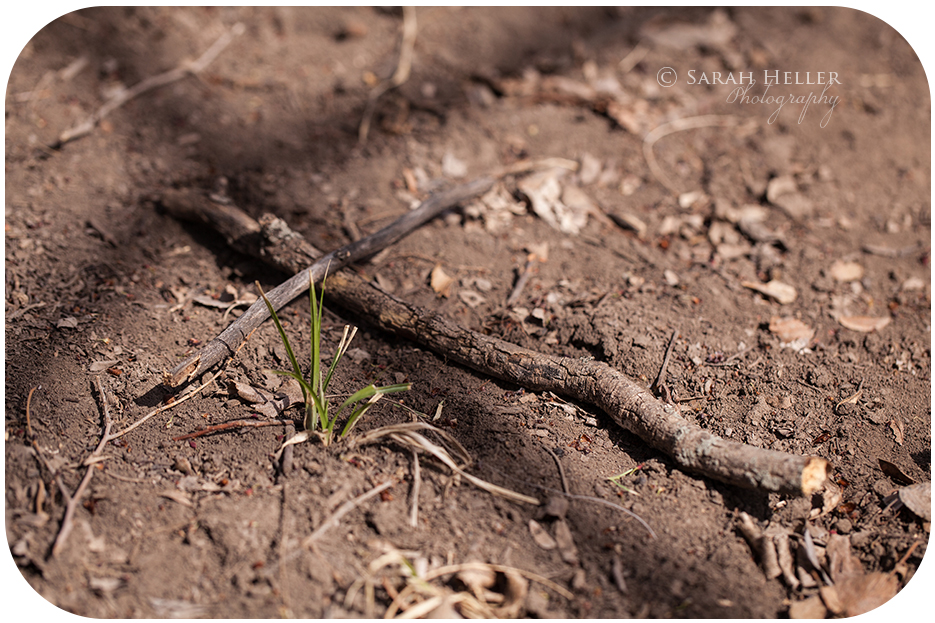
On my walk today searching for signs of spring (yes, I have to search...we desperately need rain!), I wondered through the pasture and through the trees and ended up at Marshall's grave. A few weeks ago, the kids and I had visited and put a cross made out of sticks there for him. Although it was a makeshift display and no longer standing, there it was. I saw it, a light shining on a bright green little tuft of grass and a shadow of a cross overlaying nearby. All dogs surely go to heaven! I think about the forgiving nature of dogs and their willingness to serve day in and day out. I think about their endless optimism and hope for good things to come. And, it makes me think of the hope and love of our Savior Jesus Christ. Even though I fall short on a daily basis, He loves me and YOU!

1 Corinthians 13:4-7
Love is patient, love is kind. It does not envy, it does not boast, it is not proud. It does not dishonor others, it is not self-seeking, it is not easily angered, it keeps no record of wrongs. Love does not delight in evil but rejoices with truth. It always protects, always trusts, always hopes, always perseveres.


Rest in peace big fella! 

Thursday, March 12, 2015

Hanging a Wall Grouping...Tutorial Thursday

If you have ever tried to hang a group of pictures and felt defeated, you are in the right place! I have been there, done that. My first canvas collection resulted in numerous holes in the wall apart from the needed ones to support the canvases. And, it is tempting to cut corners and try to eyeball things but it is hard to see your entire wall while you are right next to it and trying to hang things. SO, enter a new and improved method to hang a wall grouping. You can use this for canvas gallery wraps, pictures in frames, or any other type of product you want to hang. I found it especially helpful for the ornate frames since some of the frames are quite curvy. OOH LA LA! My example today features a grouping of 4 Lucy frames.

First, I visited my client's home and we talked through her order and we looked at the walls she was interested in changing. Then, we worked on a visual plan for the walls. This particular space was in the hallway and I didn't have a wide enough lens to grab a picture of the wall for my handy app so I'm using a generic wall here and after we discussed the colors  that would look good for the wall and in her home, we made the plan for the grouping to look like the image below.


I ordered the frames and once they came in, I got to work on making our template for the wall. I got all my supplies together:

measuring stick
craft paper
scissors
pencil
permanent marker
frames


I laid the frames out on top of craft paper and cut of a piece of paper large enough for them to fit on it. My paper is not wide enough to cover the height of them but that is okay since I just need to mark where the nail holes need to be. If you have a larger wall grouping, you can find wider paper or I would just suggest taping another sheet to the bottom of the top sheet so it is twice as wide.


Now you can start to refine the grouping and measure to make sure that are evenly placed. On these frames, I measured from the inner part of the frame opening so I could get a straight edge. Next, I traced around the edge of the frames with a pencil. It will help later when you are placing the template on the wall to see an outline of what will be there so you can get things lined up correctly there too.


Then, it is time to measure the distance from the top of the frame to the hole for hanging. This is a very important part so you want to make sure and get the correct measurement. I also added a few more marks: a line between the top nail hole marks so I could use it later to level the template on the wall and a mark in the center of the frames for a center reference point.


I then went to my paper and used the tracing marks to measure down the distance to the hanging hole and mark it with the permanent marker so it shows up well.


Now we are ready to hang the wall grouping. I brought my hammer, measuring tape, level, pencil, painters tape, frames and the paper template. It really helps to have an extra set of hands with this process to get things straight, lined up, and secure.


I used the horizontal line between the top two holes to level the template. And, we measured the wall to find the center and used the center on the template to line it up. We also held a frame up to the template to see where the bottom of the frame would be since my paper was not wide enough and since we were working with the upper part of the wall and did not want it to hit the wood trim. After we had it all lined up vertically and horizontally, we used the painter's tape to secure it for the next step.


Next, using the hammer and nails (many options here to hang frames but for these frames, textured wall, and the type of hanger hole, we decided to go with a common nail), I nailed into the wall just enough to mark it under the paper and removed the nails. Then, we removed the paper and hammered the nails in properly. And, NOW for the most exciting part! We hung the frames on the wall! Beautiful and simple!


I hope you enjoyed this tutorial on a simple and accurate way to hang a wall grouping! With a little extra time and effort on the front end, it makes hanging a breeze! I am excited to be able to help my clients achieve their vision and create something beautiful in their homes! I offer a complimentary design consultation with my clients. It is helpful to do them in your home, but we can also do it over the phone or email as well. Send me a picture of your wall and space and we can get started on a beautiful wall grouping for your home!

Ready to schedule a session with Sarah Heller Photography? Please CONTACT me today!

Tuesday, March 3, 2015

The F Family...North Central Kansas Photographer

I just love the images that we got from this studio family session. My studio is a wonderful alternative on cold and windy days, for little tiny babes, and for sessions during the mid-day hours. I love being able to offer the flexibility that my studio provides to my clients. We started this session around 10am and used the natural light coming in through my windows to give us a nice, soft light source. I usually work quickly indoors with families as my space is not real large and it can get a little crazy with kids if we linger too long:) And, that is exactly what we did, we zipped through many combinations and poses and got a beautiful collection that I think they will enjoy for years to come! I hope you enjoy a few of my favorites and I can't wait to help them get their walls updated with these images!

Thinking about a session? Contact me today to start working on the details for your session!:)


Thanks for looking:)